Key Takeaway:
- Changing bike pedals correctly prevents damage, improves performance, and keeps your rides safe.
- Left and right pedals have opposite threading—right pedal loosens counterclockwise, left pedal clockwise.
- Tools you need: pedal wrench or Allen key, grease, rag, and optional penetrating fluid for stuck pedals.
- Always grease threads before installation and start threading by hand to prevent cross-threading.
- Test ride after installation to ensure pedals are secure and smooth.
How to change bike pedals is one of those basic cycling skills that every rider should know. Whether your pedals are worn out, broken, or you’re upgrading to a better pair, the process requires more than just unscrewing and screwing them back in.
Different pedal types and thread directions can confuse riders, leading to cross-threading, stuck pedals, or unsafe installations.
Learning the right technique ensures your bike stays safe and responsive while giving you the freedom to upgrade pedals as your riding style evolves.
Need a Few Practical Extras for Your Next Ride?
Browse cycling-related clothing and simple bike accessories that may help with comfort, visibility, storage, or everyday riding.
Paid links. As an Amazon Associate we earn from qualifying purchases.

Why Do You Need To Change Bike Pedals?
Before we dive into changing bike pedals, let’s first look at why you might need to do this.
Broken pedals: A cracked body, worn bearings, or bent spindles mean it’s time for a replacement.
Upgrading pedals: Riders often upgrade to pedals better suited to their style—clipless for mountain biking, lightweight for road cycling, or grippy platforms for BMX. If you’re considering an upgrade, explore our guides on the best mountain bike clipless pedals or best BMX pedals.
For a deeper dive into pedal options, check out our full guide on bike pedal types.
Left vs Right Pedals (Understanding Reverse Threading)
One of the most common mistakes cyclists make is forgetting that pedals are threaded differently on each side.
- Right pedal (drive side): Standard thread, loosens counterclockwise.
- Left pedal (non-drive side): Reverse thread, loosens clockwise.
This design prevents pedals from loosening while riding. Pedals are usually marked with “L” (left) and “R” (right) to help you identify the correct side. For a more detailed explanation, see are bike pedals reverse threaded?.

What You Need To Change Bike Pedals
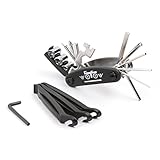
Before you begin, make sure to have the right tools on hand. You’ll need a pedal wrench – used specifically for pedals. A set of Allen keys or hex wrenches are also helpful in this process. Most pedals require either an 8mm Allen (hex) key or a 15mm spanner.
Remember your grease, clean rag, and a pair of pliers. Grease will help keep the pedal threads lubricated and prevent them from seizing up. You’ll need the rag to clean off any dirt or grime accumulating on the pedals. The pliers are there to help remove any stubborn bolts.
Pro Tip: Before upgrading, confirm compatibility. Wondering if pedals fit all bikes? See our guide: are bike pedals universal?.



How To Change Bike Pedals
If this is the first time you’ve changed your bike pedals, it might feel a bit tricky. But with a few simple steps, you’ll finish in no time.
To remove bike pedals:
To change a bike pedal, you need to remove the old pedal from the spindle and install a new one. The process involves unscrewing the pedal from the spindle using a pedal wrench or an Allen wrench, depending on the type of pedal you have.
The pedal axle or pedal spindle is the long metal rod that extends through the center of the pedal body. It is what connects the pedal to the crank arm of the bike. The spindle is usually made of steel or titanium and is designed to be strong and durable.
- Set your bike up in the stand and lay out your tools, rag, and grease. Remember that you should know the difference between the right and left pedal by this point.
- First, remove the non-drive side from the pedal spindle. This is the left-hand side while you’re pedaling. Attach the Allen Key from behind the crank arm or use the wrench on the front. Turn the bolt clockwise until it loosens and undoes the pedal.
- Remove the drive side pedal from the pedal spindle. Attach your Allen key or pedal wrench to the bolt and turn it counterclockwise. After you’ve applied some force, it should loosen up.
- If pedals are stuck, apply penetrating fluid and use your body weight for extra leverage (Pearson Cycles, 2021; Condor Cycles, 2024). See detailed tips in how to remove stuck bicycle pedals.
To install new bike pedals:
When installing a new pedal, it’s important to ensure that the pedal threads match the spindle threads. This means that if the spindle has a standard thread, you should install a pedal with a standard thread, and if the spindle has a reverse thread, you should install a pedal with a reverse thread.
- Check the shaft of each pedal to know which one is for the drive side or the non-drive side. The drive side pedal is always on the right and has a flat surface.
- Apply some grease to the crank arm threads. Once there is no grit or dirt, clean the threads on your pedals.
- To begin, grab the right pedal. Make sure it is the correct pedal before you place it into the crank arm. Apply some grease to the thread to keep it from getting stuck. Turn it clockwise into the crank arm until finger tight. Next, tighten up the pedal using your tool.
- Do the same for the left pedal.
- Wipe off any grease that could have come from the pedals. Check to see if you managed to install the pedals correctly.

How To Test Ride After Pedal Installation
- Check for noise: Spin the pedals—listen for clicking or grinding.
- Start slow: Ride in a safe area. Ensure pedals feel stable and smooth.
- Shift gears: Make sure new pedals don’t interfere with crank clearance.
- Take turns: Pedals should not scrape or wobble.
- Recheck tightness after your test ride.
Take your time, be careful, and double-check everything before hitting the road. And if you’re not sure about changing pedals on your own, it’s always better to seek the help of a bike expert.

Expert Insights & Research-Backed Tips
Research articles and authoritative cycling sources provide practical guidance on how to change bike pedals with specific steps and safety precautions.
- Place the drive-side crank at 3 o’clock for maximum leverage.
- Use a pedal spanner or Allen key in the correct orientation.
- Lubricate pedal threads before installation to prevent seizure.
- Always hand-thread before tightening to avoid cross-threading.
- For stuck pedals, penetrating oil and controlled force are recommended (Pearson Cycles, 2021; Condor Cycles, 2024).
According to experts, these steps are fundamental for safe bike maintenance, and proper installation boosts rider confidence and bike longevity.

Maintenance Tips for Longer Pedal Life
Here are some tips to help you keep your bike pedals in top shape:
- Keep them clean: Dirt, dust, and grime can build up on your pedals over time, causing them to wear out faster. So, make sure you clean your pedals regularly. You can use a damp cloth or a soft-bristled brush to gently scrub away any dirt or grime.
- Lubricate the pedals: Lubrication is key to ensuring that your pedals spin smoothly. You can use a bike-specific lubricant or grease to keep your pedals running smoothly.
- Check the tightness: Over time, the bolts that hold your pedals in place can come loose. Make sure to check the tightness of the bolts regularly and tighten them if necessary.
- Use appropriate pedals: Make sure you’re using pedals that are appropriate for your riding style and needs. There are many different types of pedals available, so do your research to find the right ones for you.
- Replace bike pedals when necessary: Like all bike components, pedals will wear out over time. If you notice any signs of wear and tear or if your pedals start to feel loose, it’s time to replace them.
If you’re experiencing resistance when riding, see our guide: why is my bike so hard to pedal?.
Now, you might be wondering how often you should replace your bike pedals. The truth is, there’s no one-size-fits-all answer to this question. It depends on a variety of factors, such as how often you ride your bike, your riding style, and the conditions in which you ride. As a general rule of thumb, it’s a good idea to replace your pedals every 6-12 months or when they start to show signs of wear and tear.

FAQs
What bike pedals should I use?
The type of pedals you should use will depend on your bike and what type of riding you plan to do. Some of the most popular bike pedals include clipless pedals, platform pedals, and flat pedals.
Are bike pedals the same sizes?
Generally speaking, bike pedals are the same size. However, some manufacturers may differ in sizes slightly, so it’s always best to check before you buy.
How tight should I make my bike pedals?
When installing your bike pedals, make sure they aren’t too tight or too loose. Give the bolts and nuts a few turns with your pedal wrench to ensure they’re secure but not overly tightened. You should also be able to rotate the pedals with your hand when they’re properly installed.
How often should I change my bike pedals?
It’s generally recommended to change your bike pedals every 6-12 months, depending on how much you use them. If you ride frequently, you may need to replace them more often. If the pedals are starting to feel worn or not secure, it’s time to replace them.
How many calories do you burn when cycling?
Use our calories burned cycling calculator to track energy expenditure during your rides.
Conclusion on How to Change Bike Pedals
Knowing how to change bike pedals is a must for every cyclist. By following the correct thread direction, greasing threads, and starting by hand, you can safely and quickly install new pedals. Whether you’re replacing worn-out pedals or upgrading for performance, this skill will keep your bike safe, efficient, and enjoyable to ride.
References
Pearson Cycles. (2021, September 8). How to change your pedals: Everything you need to know. https://www.pearsoncycles.com/blogs/1860-hub/how-to-change-your-pedals-everything-you-need-to-know
Condor Cycles. (2024, December 2). How to remove pedals. https://www.condorcycles.com/blogs/journal/how-to-remove-pedals