Key Takeaway:
- Properly adjusted bike brakes are essential for safety and performance.
- Mechanical brakes require cable tension and brake pad alignment, while hydraulic brakes often self-adjust.
- Using barrel adjusters, checking pad wear, and ensuring calipers are aligned can prevent squeaking, rubbing, or weak braking.
- Regular inspection and adjustment not only boost rider confidence but also extend bike longevity.
How to adjust bike brakes is one of the most important skills every cyclist should learn. Brakes enable you to stop quickly and safely, and poorly adjusted brakes can reduce performance, cause squeaking, or even lead to accidents.
Many riders struggle with brakes that rub, squeak, or feel too soft, but simple adjustments can restore smooth, reliable stopping power.
By keeping your braking system well-maintained and correctly tuned, you’ll enjoy safer and more comfortable rides—whether on road, mountain, or hybrid bikes.
Need a Few Practical Extras for Your Next Ride?
Browse cycling-related clothing and simple bike accessories that may help with comfort, visibility, storage, or everyday riding.
Paid links. As an Amazon Associate we earn from qualifying purchases.
Reasons To Adjust Bike Brakes
There can be varying reasons why and when cyclists need to adjust their brakes. Here are some of the common reasons:
- Worn out brake pads. Brake pads wear out over time. Check the thickness of your pads and replace them if necessary. If your brake pads are too thin, they won’t stop your bike as quickly or effectively. See our guide on the best bike brake pads or best road bike brake pads if you need replacements.
- The brake lever is too close to the handlebars. If your brake levers are too close to the handlebars, it can make braking difficult. The ideal distance should be two to three fingers wide.
- Disconnected or loose cables. If your brakes are not responding properly, check if all the cables are connected to the calipers and levers. If they aren’t, you’ll need to reconnect them.
- Stop brakes from squeaking. Squeaking brakes can be annoying and embarrassing when cycling. If your brakes are squeaking, you may need to tighten the cable or replace the brake pads.
- Stop brakes from pulling and rubbing. If your brakes are pulling or rubbing, you must adjust the alignment of the calipers or tighten the cable.
- Clean brakes for better performance. Regularly cleaning your brakes can help improve the overall performance of your bike’s braking system.
- Dirty braking surface. Cleaning rims or rotors regularly improves overall performance.
Adjust your brakes when necessary to maintain a safe and comfortable cycling experience. It’s a simple step to help you stay safe on the road.
Three Primary Brake Systems
Bicycles these days are typically equipped with three primary brake systems: caliper, V-brake, and disc brake.
The Caliper Brake System
Caliper brakes are the most common and use two brake pads that press against the rim of your wheel. This type of system is easy to adjust and maintain. This is the type of brake you will see on road bikes.
V-Brake System
V-brakes are usually seen on mountain or hybrid bikes. V-brakes use two long arms with connecting cables that pull the brake pads against the wheel rim when you squeeze the brake levers. This system requires more maintenance than caliper brakes and can be harder to adjust.
Disc Brake System
Disc brakes offer greater stopping power than the other two systems. You will usually find disc brakes on a mountain bike. Disc brakes use a rotor mounted to the wheel and calipers attached to the frame or fork. This type of system is the most powerful and resistant to bad weather, but it also requires more maintenance and adjustment. See our full guide on how to adjust bike disc brakes.
What You’ll Need When Adjusting Bike Brakes
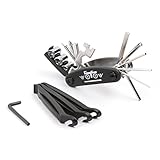
When adjusting your bike’s brakes, you will usually need the following tools:
- Allen keys
- Screwdriver
- Adjustable Wrench
- Ring spanner
- Pliers
- Rag
- Brake oil (for disc brakes)


Pro Tip: For best results, make sure your bike fits properly. Use our bike tire size calculator and bike frame size calculator to ensure compatibility when upgrading or servicing brakes.
How to Adjust Bike Brakes
The following steps will help you adjust your brakes in no time.
Adjusting Caliper Brakes
- Make sure to align your brakes in the center. Check that the distance between the brake pads and the rim are equal. Another way to tell is by squeezing the brake and observing if the brake pads meet at the same time. But if one pad pushes the rim onto the other pad, loosen up the bolt, realign your brake, then firmly tighten it again.
- Next, check the distance between the pads and the rim by holding the brake caliper and loosening the bolt securing the cable. Next, squeeze/release the brake calipers a little. Secure the clamp to the brake rotor and continue adjusting until the lever feels the way you want it to before testing. Make sure to retighten the bolt.
- Every time you ride—and adjust your brakes—make sure the lever near the fork is facing downwards rather than out. This gives space for tire clearance when removing the bike wheel.
- Ensure the brake pads are centered on the braking surface. The pads should never touch the tire’s sidewall and always remain higher than the braking surface. Test this by spinning the wheel and examining that the brake pads align with the braking track uniformly around its circumference.
- Find the barrel adjuster. To adjust the pads and for cable stretched over time, turn the barrel clockwise to move the pads away from the rim and counterclockwise to move them closer. You can also make micro-adjustments from the saddle without resetting tension altogether.
Adjusting Disc Brakes (Mechanical)
- Before you get started, make sure to check that the wheel is in alignment with the dropouts. Disengage the quick-release skewer if needed. If possible, ask someone to crank the wheel. This way, you can focus on its placement.
- If you discover that the wheel isn’t in an aligned position within the dropouts, realign it by repositioning the quick-release skewer. This should alleviate brake rubbing problems. If not, double-check and adjust your disc brakes.
- Skip ahead to the section in your bike’s manual that tells you where to find the caliper. To loosen the disc brake caliper, turn its bolt counterclockwise (to the left). There is no need to remove the bolt completely. A little bit of movement will suffice for adjusting purposes.
- To brake properly, apply pressure to the Brake Lever while moving the Disc Brake Caliper. Keep a tight grip on the lever as you refasten the Disc Brake Caliper bolt. Rotate the bike wheel to check that there is space between the disc and the brakes. If necessary, try this process again until everything lines up correctly.
Adjusting V-brakes
- Check if the tire is in the center and spinning smoothly. Adjust the tension on the cable. With both brake arms still in hand, release the brake cable.
- Slowly take your hand off the brake arms until the brake pads are about as close to the rim for ideal braking. With your free hand, guide the cable through its clamping point.
- Attach the brake cable and tighten the bolt. To confirm that it is to your preference, squeeze the lever and check whether the travel of the brake lever is comfortable for you.
- After setting the cable tension, adjust the pad placement. Press the V-brake arms into the bicycle rim to mimic braking. You can also squeeze the brake lever. With one hand, hold the brake pad so it is touching the center of the tire’s braking track. Then, use your other hand to retighten the bolt. Align and tighten both sides.
- If your brakes are rubbing on one side, don’t worry! This is an easy fix that only requires a few screws. On each brake arm, a metal spring goes up the back of the arm. The tension of this spring is what you need to adjust with these screws. To fix a brake pad that is rubbing, turn this screw to the right to increase tension on the spring. This will cause the brake arm to move out. To ensure your pads are not rubbing on the rim and contacting evenly, keep adjusting until you’re happy with their position. Once you’ve done that, check how the brake feels when you squeeze it. If necessary, repeat steps 1-3 to fine-tune the feel of the brake.
Expert Insights & Safety Considerations
Proper adjustment of bike brakes is essential for safety and performance. Mechanical brakes require manual adjustments of cable tension and pad positioning to ensure optimal rim or rotor contact. Barrel adjusters and knobs allow fine-tuning for better control and less wear (Level Nine Sports, 2025; iBombo, 2024).
- Brake pads should always be aligned parallel and centered on the braking surface to avoid tire damage (Level Nine Sports, 2025).
- For disc brakes, centering the caliper by loosening bolts and tightening while holding the lever prevents rotor rubbing (Cycle Plan, 2025).
- Hydraulic brakes self-adjust, but routine inspections for pad wear, rotor damage, and leaks are still necessary (SRAM, 2020).
- Predictive maintenance research from bike-sharing systems shows timely brake adjustments reduce wear and improve rider safety (arXiv, 2010).
- Regular maintenance not only increases safety but also extends bike longevity (Bike Teacher, 2024).
FAQs on How to Adjust Bike Brakes
How do I know if my bike brakes need adjusting?
If braking feels weak, squeaky, or uneven, or if levers pull too close to the bars, it’s time for an adjustment.
Why are my bike brakes squeaking even after adjusting?
Dirty rims or glazed pads may be the cause. Clean surfaces or replace pads if needed.
How often should I adjust my bike brakes?
Check alignment every few weeks, or sooner if you ride frequently. Inspect before long rides for maximum safety.
Conclusion
Knowing how to adjust bike brakes ensures safer rides, better performance, and less wear on your components. Whether you ride with calipers, V-brakes, or disc brakes, mastering these adjustments will keep your bike responsive and reliable on any terrain. Stay consistent with checks and enjoy confident cycling!
References
- How to adjust road bike brakes. (2025, July 24). Level Nine Sports. https://www.levelninesports.com/bulletin/learn-center/bike-gear-education/how-to-adjust-road-brakes
- Brake adjustment: Ensuring safe riding. (2024, April 1). iBombo. https://www.ibombo.eu/article/brake-adjustment-ensuring-safe-riding/
- How To Easily Adjust Your Bike Brakes. (2025, March 12). Cycle Plan. https://www.cycleplan.co.uk/blog/how-to-adjust-bike-brakes/
- 9 Important Things To Know About Road Disc Brakes. (2020, January 13). SRAM. https://www.sram.com/en/service/articles/9-important-things-to-know-about-road-disc-brakes
- Predictive maintenance for Barcelona’s bike-sharing system. (2010, September 29). arXiv. https://arxiv.org/html/2404.17217v1
- The Importance Of Bicycle Maintenance. (2024, March 18). Bike Teacher. https://www.biketeacher.com/blog-repair/2024/3/19/the-importance-of-bicycle-maintenance