Key Takeaways
- Learning how to tighten a cycle chain correctly improves pedaling efficiency, safety, and ride comfort.
- A properly adjusted chain reduces drivetrain wear and prevents unexpected derailments.
- Most chain tension issues can be fixed at home using basic tools and simple checks.
- Over-tightening is just as harmful as riding with a loose chain—proper slack matters.
- Regular inspections and lubrication extend chain life and improve overall bike performance.
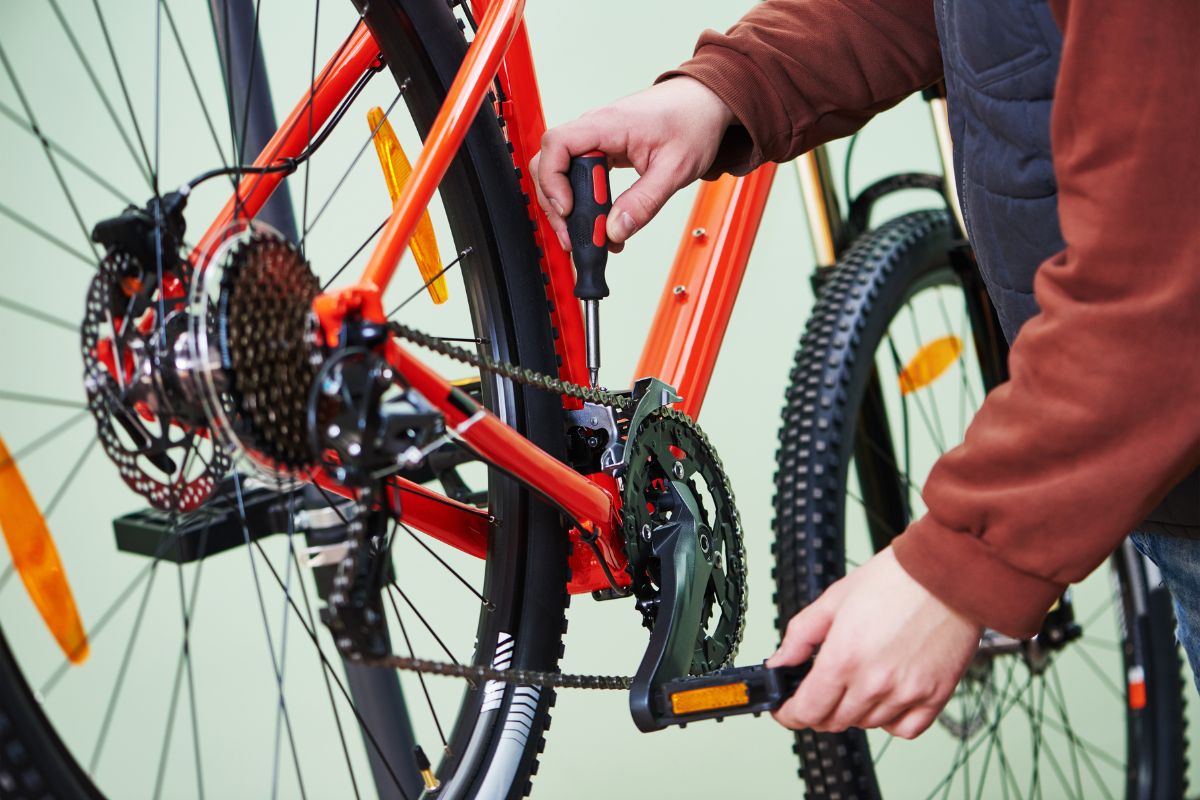
If you’re wondering how to tighten a cycle chain properly, you’re not alone—chain slack is one of the most common issues cyclists face, especially during regular commuting or longer rides.
Have you ever felt your bike chain slacken during a ride? It’s not just annoying; it can actually impact your bike’s performance and your safety.
A well-tightened chain ensures smooth pedaling, efficient power transfer, and a safe, enjoyable ride.
Need a Few Practical Extras for Your Next Ride?
Browse cycling-related clothing and simple bike accessories that may help with comfort, visibility, storage, or everyday riding.
Paid links. As an Amazon Associate we earn from qualifying purchases.
In this article, we’re diving into how to keep your chain in tip-top shape so you can ride with ease and confidence.

The Importance of Maintaining a Properly Tightened Cycle Chain
Keeping your cycle chain in the right condition is key to ensuring your bike performs at its best. Here’s why it’s so crucial:
- Enhanced Bike Performance: A tight chain directly translates to better power transfer from your pedals to the wheels. You get more go with each pedal stroke, making your ride not only smoother but also faster and more responsive.
- Increased Safety: A slack chain can derail or jam unexpectedly, leading to sudden stops or crashes. Proper tension keeps the chain in place, providing a safer ride.
- Reduced Wear and Tear: When a chain is too loose, it can cause excessive wear on both the chain and the sprockets. Tightening it appropriately extends the life of these components, saving you money and hassle in the long run.
Benefits of a Well-Adjusted Chain
Understanding the benefits in more detail:
- Smoother Rides: A well-adjusted chain minimizes the jolts and bumps you feel when the chain slips or hits the derailleur. It’s all about that seamless transfer of energy.
- Optimal Use of Energy: With a tight chain, each pedal push propels you further. You’re not wasting any effort—a must for long rides or competitive racing.
- Longevity of Bike Parts: A chain that fits well doesn’t overstress other parts. This means less strain on your gears and fewer trips to the bike shop.
- Quieter Operation: A loose chain can rattle against the frame and gears. A tight one maintains peace, allowing you to enjoy the sounds of your surroundings or your own thoughts.
What Causes a Bicycle Chain to Loosen?
A bicycle chain is bound to loosen over time due to various factors, but understanding these can help you keep your bike in prime condition for longer. Here’s a breakdown of the main culprits behind a slackening chain:
Natural Wear and Tear
- Chain Stretch: Believe it or not, chains don’t actually “stretch.” The metal wears down at the rivets and links, causing the chain to become longer over time. This is the most common cause of chain looseness.
- Material Fatigue: Continuous stress from pedaling, especially under high loads or on challenging terrains, can fatigue the metal, leading to wear.
Impact from Riding
- Rough Terrain: Bumpy roads or trails can jolt the chain, exacerbating wear and stretching.
- Frequent Shifting: Regularly changing gears, especially under strain (like pedaling uphill), can strain the chain and speed up wear.
Improper Previous Installation
- Incorrect Sizing: A chain that’s too long for the bike from the start is more prone to slip and wear out its welcome sooner.
- Poor Adjustment: If the initial chain tension wasn’t set right, it’s likely to loosen up more quickly.
External Factors
- Lubrication Issues: Too much or too little lubricant can both lead to problems. Excessive lubricant attracts grime, which wears down the chain, whereas too little causes increased friction.
- Environmental Effects: Exposure to mud, sand, and water, especially without proper cleaning, speeds up the deterioration of your chain.
Tips for Prevention
To mitigate these issues and extend the life of your bike chain, consider these tips:
- Regular Cleaning and Lubrication: Keep the chain clean and well-lubricated to reduce wear from dirt and grime.
- Smooth Shifting Practices: Shift gears gently and try to avoid shifting under high pedal pressure when possible.
- Routine Inspections: Check your chain regularly for signs of wear or elongation. A simple ruler or a specialized chain checker tool can help you spot problems early.

Tools You Will Need
Before you start the task of tightening your bicycle chain, gathering the right tools is essential. Each tool plays a crucial role in ensuring the adjustment is precise and effective. Here’s what you’ll need for a successful maintenance session:
Chain Tool
- Purpose: This tool helps to check for chain wear and is used for removing or replacing links if necessary.
- Usage Tips: Make sure to use a chain tool that matches your chain type. Incorrect size can damage the links.
Wrenches
- Variety Needed: You’ll typically need a set of metric wrenches or an adjustable wrench.
- Purpose: These are used to loosen and tighten the bolts on your rear wheel, allowing you to adjust the tension of the chain.
Ruler or Chain Wear Indicator
- Purpose: Measures the wear and elongation of your chain to determine if it’s time for a replacement.
- How to Use: Place the tool on the chain and see if the measurement falls within the acceptable range for your bike.
Clean Cloth and Lubricant
- Clean Cloth: Used for wiping off grime and excess lubricant from the chain.
- Lubricant: Essential for ensuring the chain runs smoothly after tightening.
- Selection: Choose a lubricant suitable for your riding conditions—wet or dry lubricants are available depending on the typical weather you ride in.
Additional Handy Items
- Bike Stand: If you have access to one, a bike stand elevates your bike, making it easier to work on.
- Gloves: Protect your hands and improve grip with a good pair of work gloves.
- Flashlight or Good Lighting: Good visibility is crucial when working on the intricate parts of your bike.
Quick Tips for Tool Use
- Stay Organized: Keep your tools close by and organized. A tool tray or a simple cloth can help keep everything in place.
- Check Compatibility: Before you begin, ensure all tools are compatible with your bike’s specific make and model to avoid any damage.

Step-by-Step Guide to Tightening Your Bicycle Chain
Tightening your bicycle chain is crucial for smooth and safe rides. Whether you’re preparing for a leisurely cycle or gearing up for a race, proper chain tension ensures optimal performance. Here’s a clear, step-by-step guide to get your chain just right:
Step 1: Assess the Chain’s Condition
- Inspect for Wear: Lift your bike chain off the rear sprocket slightly. If it lifts too far from the sprocket, it may be too loose or worn out.
- Check for Damage: Look for any damaged links or unusual wear patterns. If the chain is severely worn or damaged, consider replacing it instead of just tightening.
Step 2: Loosen the Rear Wheel
- Locate the Axle Nuts or Quick Release: These are found on either side of the rear wheel.
- Use the Right Tool: Use a wrench to loosen the axle nuts or open the quick release lever.
- Slight Adjustment: You don’t need to remove the wheel—just loosen it enough to adjust the chain’s tension.
Step 3: Adjust the Chain Tension
- Position the Wheel: Slowly push the rear wheel back in the dropouts to increase the tension on the chain.
- Check Tension: The chain should be tight enough that it only allows for about half an inch of vertical movement.
- Avoid Over-Tightening: Make sure the chain is not so tight that it hinders the smooth rotation of the pedals and gears.
Step 4: Re-tighten and Align the Rear Wheel
- Secure the Wheel: Once the desired tension is achieved, tighten the axle nuts or close the quick release lever.
- Check Alignment: Ensure the wheel is perfectly aligned in the frame for smooth riding and to prevent uneven tire wear.
- Double-Check Tightness: Give a final check to ensure everything is securely fastened.
Step 5: Test and Fine-tune
- Take a Test Ride: Carefully ride your bike on a flat surface to feel the tension and listen for any unusual sounds.
- Observe Performance: Pay attention to how the bike shifts and how the chain moves. If there are any issues, you may need to readjust.
- Fine-tune as Needed: Sometimes a small readjustment is necessary after a test ride to achieve perfect tension.

Common Mistakes to Avoid
When tightening your bicycle chain, there are several pitfalls that can complicate your maintenance routine and potentially harm your bike. Being aware of these common errors can help you ensure a smoother ride and prolong the life of your bicycle. Here’s what to watch out for:
Over-Tightening the Chain
- Consequences: A chain that’s too tight can stress your bike’s drivetrain and lead to premature wear of both the chain and the sprockets.
- Identification: If pedaling feels unusually hard or if the chain makes a grinding noise, it might be too tight.
- Prevention: Always allow for a small amount of play in the chain (about half an inch of vertical movement).
Neglecting Wheel Alignment
- Impact: A misaligned wheel can cause uneven wear on tires and can affect your bike’s handling, making it potentially unsafe.
- Check: After adjusting the chain tension, ensure that the wheel is centered in the frame.
- Adjustment: If necessary, loosen the axle nuts slightly and realign the wheel before tightening again.
Forgetting to Lubricate
- Drawbacks: Without proper lubrication, a newly tightened chain can be noisy and wear out quicker than expected.
- Solution: After adjusting the chain, apply a suitable lubricant to ensure smooth operation and protection against rust.
- Tip: Use a lubricant appropriate for your usual riding conditions (wet or dry).
Using Improper Tools
- Risk: The wrong tools can damage your bike’s components and make the job harder than it needs to be.
- Advice: Invest in a good quality bicycle maintenance toolkit that includes a chain tool, appropriate wrenches, and a chain wear indicator.
Ignoring Manufacturer’s Instructions
- Importance: Each bike has specific requirements based on its design and materials.
- Resource: Consult your bike’s manual for recommended chain tension and maintenance tips.
- Customization: Tailor your maintenance to fit the specific needs and specifications of your bike.
Quick Tips for Effective Maintenance
- Consistency: Make chain maintenance a regular part of your bike care routine.
- Education: Learn as much as you can about your bike’s specific maintenance needs—knowledge is power!
- Professional Insight: Don’t hesitate to seek advice from a professional mechanic if you encounter issues or have questions.
Read also: How To Remove Rust From Bike Chain
What Research Says About Chain Tension and Performance
Recent research highlights that correct chain tension directly influences drivetrain efficiency and component longevity.
Controlled laboratory testing has shown that drivetrain efficiency can range from approximately 80% to nearly 99%, depending on chain tension and sprocket engagement. Higher efficiency is achieved when the chain operates within recommended tension limits, avoiding both slack and excessive tightness (Urunkar et al., 2014).
More recent engineering research has also demonstrated that small levels of chain elongation—often invisible to the naked eye—significantly affect power transfer and maintenance timing, reinforcing the importance of regular tension checks rather than reactive repairs (Dowd, 2025).
These findings support routine inspection and proper adjustment as essential habits for both safety and performance.




Additional Maintenance Tips
Regular maintenance goes beyond just tightening your bicycle chain. To keep your bike in top condition and ensure it performs well on every ride, consider these additional care tips. Each one will help extend the life of your bike and enhance your cycling experience.
Regular Cleaning and Lubrication
- Cleaning: After every few rides, especially if you’ve been on muddy or dusty trails, give your bike a thorough clean. Focus on the chain, gears, and wheels.
- Lubrication: Apply lubricant to the chain after cleaning. This helps reduce friction and wear, and prevents rust.
- Type of Lubricant: Choose a lubricant based on your riding conditions—wet lubricants for damp environments and dry lubricants for dusty conditions.
Checking and Adjusting Brakes
- Safety Check: Regularly check your brakes for wear and ensure they are adjusted correctly.
- Brake Pads: Replace worn brake pads to maintain effective stopping power.
- Cables: Inspect brake cables for fraying or rusting and replace them if necessary.
Inspecting Tires for Wear and Proper Inflation
- Tire Pressure: Check tire pressure before each ride as part of your pre-ride inspection. Properly inflated tires reduce the risk of punctures and improve performance.
- Wear Patterns: Look for signs of uneven wear or deep cuts that could lead to punctures. Replace tires when they start to show excessive wear.
Tightening Bolts and Screws
- Regular Checks: Bolts and screws can loosen over time due to vibrations during rides. Periodically check and tighten them to ensure everything is securely fastened.
- Critical Areas: Pay special attention to critical components such as the handlebars, seat post, and pedals.
Checking for Frame Damage
- Visual Inspection: Regularly inspect the frame for any signs of cracks or severe scratches, which can weaken the structure.
- Professional Assessment: If you suspect frame damage, have it assessed by a professional to determine if it is safe to ride.
Quick Tips for Effective Bike Maintenance
- Routine Schedule: Establish a regular maintenance schedule based on how often you ride and the conditions in which you typically cycle.
- Tool Kit: Keep a basic bike maintenance kit at home. Include essential tools like a pump, spare tubes, a multi-tool, and a patch kit.
- Learning Resources: Consider attending a bike maintenance workshop or watching instructional videos to improve your DIY skills.
Helpful Bike Chain Resources
If tightening doesn’t fully solve the issue, these guides may help:
- If your chain slips or comes off frequently, start here: how to fix a bike chain
- If your chain is too long: how to shorten a bike chain
- For proper cleaning before adjustment: best bike chain degreaser
Conclusion on How to Tighten a Cycle Chain
Knowing how to tighten a cycle chain correctly is a foundational skill that improves safety, efficiency, and overall riding confidence.
By inspecting your chain regularly, maintaining proper tension, and following proven adjustment steps, you prevent common mechanical issues and extend the life of your drivetrain.
A well-maintained bike rides quieter, responds better, and lasts longer—making every ride more enjoyable and worry-free.
References
Dowd, T. (2025). A high precision in-situ chain wear measurement tool. Sports Engineering, 28, Article 50. https://link.springer.com/article/10.1007/s12283-025-00532-5
Urunkar, R. U., et al. (2014). Study of drive mechanisms of bicycle, tricycle or like vehicles. International Journal of Engineering Research and Applications, 4(1), 214–219. https://www.ijera.com/papers/Vol4_issue1/Version%202/AC4102214219.pdf